
If your spinach looks sad, tomatoes taste bland, or flowers seem stuck at ‘meh,’ chances are your soil's running low on key minerals. Even store-bought compost won’t fix a full mineral crash.
It’s easier than you think to put those missing minerals back in. Most folks don’t realize this, but plain dirt can lose stuff like calcium, magnesium, and trace elements in just a season or two—especially after watering, summer rain, or a few years of harvesting veggies without giving anything back. If you keep growing food in one spot, those nutrients leave faster than Rufus chasing a squirrel.
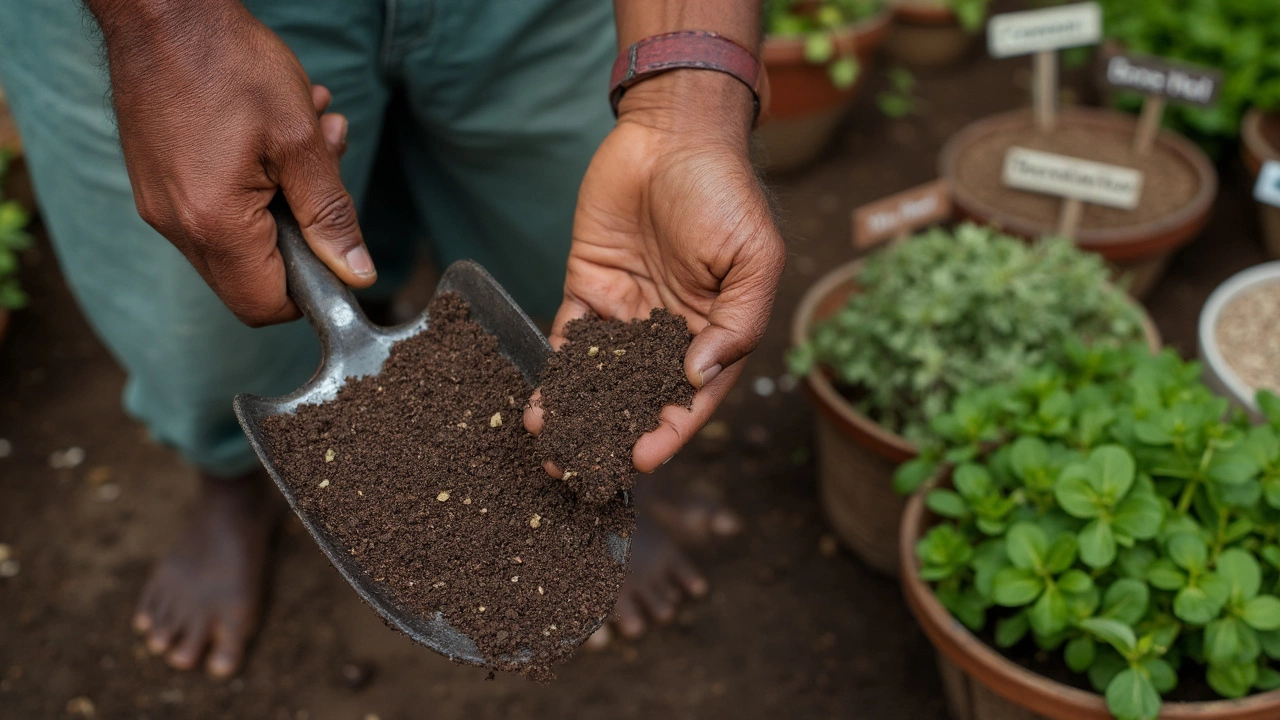
Before you start dumping random powders or fertilizers, get to know what your soil actually needs. You won’t cook a meal without checking the pantry first, right? Same goes for your backyard dirt. A cheap soil test kit from the hardware store tells you which minerals are low—even the $15 kit is good enough.
- Why Soil Loses Minerals
- Spotting Mineral Deficiency
- Remineralizing Methods That Work
- Checking Your Results
Why Soil Loses Minerals
Garden soil doesn’t start out poor, but it definitely doesn’t stay rich forever. A lot of people think a bag of compost or some store-bought dirt mix gives plants everything they need—but over time, the building blocks your plants depend on just slip away.
The biggest reason for this is simply rematerialize garden soil overuse. When you grow veggies, herbs, or flowers in the same patch again and again, the roots pull up minerals like calcium, potassium, and magnesium. Each crop takes a little more, and if you’re harvesting (and not returning the plant matter to the ground) those minerals go with your food.
Water is another sneaky culprit. Rain, irrigation, and even flooding can wash key nutrients deeper than roots can reach, or straight out of your garden. You’ll see this especially in sandy soils which drain faster—think about how quick Milo soaks through his soccer socks compared to a thick pair of wool.
Weather has a say, too. Heavy rains, drought swings, and fast temperature changes break down minerals and make them harder for plant roots to grab. Add in wind and you’ve got erosion, which literally blows or washes away the topsoil—along with its good stuff.
Using the wrong fertilizers doesn’t help, either. Lots of chemical fertilizers pack a punch of nitrogen or phosphorus, but skip the minor minerals. That means you get green leaves at first, but the soil actually gets emptier under the surface. Tilling or digging the ground up all the time hurts, too, since it tears up soil structure and lets more minerals escape.
| Reason | Minerals Lost Most Often |
|---|---|
| Continuous harvesting | Calcium, potassium, magnesium |
| Heavy rain or over-watering | Calcium, iron, trace minerals |
| Frequent tilling | All types, but especially minor elements |
| Extreme weather & erosion | Topsoil nutrients (wide mix) |
So it’s not just a single thing causing the problem. Everyday gardening habits can drain minerals out of soil surprisingly fast. The good news? Once you know why it happens, it’s a whole lot easier to get those minerals back in the game and help your plants thrive for years.
Spotting Mineral Deficiency
Soil that's empty of key minerals just can't raise strong, tasty crops. Early signs show up in the leaves, fruit, and overall plant growth. Catching these little hints early saves you hassles later on.
Look for these classic clues in your garden:
- Pale or yellow leaves – Unusual yellowing between veins, especially on older leaves, often means magnesium or iron is missing.
- Weak stems and slow growth – This usually ties back to poor calcium or potassium levels.
- Blotchy or browning edges – A telltale sign you’re low on potassium or magnesium.
- Poor fruit or flower set – If blossoms drop or fruit look small and hard, check your phosphorus and calcium.
- Leaf tips curling or dying – Too little calcium does this, showing up first on new leaves.
Kids spot this stuff easily—my son Milo once pointed out our lettuce had yellow patterns way before I noticed. Don’t count on one symptom, though. Sometimes a mix of symptoms points to several problems at once.
If you want to go beyond guesswork, grab a soil test kit from a garden store or order one online. They’re super straightforward. Some even mail you a chart with results, like the quick sample below:
| Mineral | Low Range | Ideal Range |
|---|---|---|
| Calcium (Ca) | < 500 ppm | 1000–1500 ppm |
| Magnesium (Mg) | < 60 ppm | 80–120 ppm |
| Potassium (K) | < 60 ppm | 120–200 ppm |
| Phosphorus (P) | < 15 ppm | 25–35 ppm |
If your numbers fall low, it’s time to get serious about rematerialize garden soil efforts. Matching your fix to the actual mineral gap is way better than buying random products.
Remineralizing Methods That Work
Bringing missing minerals back to your garden soil isn’t rocket science. You just need to match the right fix to what your soil’s lacking. Skipping this step is like tossing vitamins at random and hoping for magic.
Here’s what actually works for rematerialize garden soil and improves it for healthy plants:
- Rock dust: Lots of gardeners swear by basalt, granite, or glacial rock dust. They’re packed with trace minerals like iron, copper, and zinc. Just sprinkle a few handfuls per square meter and mix it into the top layer. Glacial rock dust is often the go-to in North America—pretty easy to find online or in garden stores.
- Greensand: This ancient sea mineral is loaded with potassium and iron. A bonus: it holds on to water so roots get more during dry spells. Just follow the bag directions; usually, two to five pounds for every 100 square feet.
- Gypsum: Got heavy clay or soil low in calcium? Gypsum breaks up clumps, adds calcium and sulfur, and won’t mess with your pH. A common rate is five pounds per 50 square feet.
- Seaweed and kelp meal: Seaweed seriously boosts trace minerals plus growth hormones that help young plants get established. Milo calls our bucket of dried kelp “garden magic powder.” Sprinkle a cup per 10 square feet or steep it in water to use as a liquid feed.
- Compost: Finished compost won’t totally fix mineral shortages by itself, but homemade stuff (especially with eggshells and veggie scraps) gives a nice nutrient bump and improves soil life. Layer on an inch or two every spring and fall.
If you’re on a budget, you can mix and match based on what your soil test shows. No need to throw every product at once. Most bags have direction labels so you don’t overdo it.
Check out how some options stack up per 100 square feet:
| Amendment | Main Minerals | Typical Dosage | Cost (USD) |
|---|---|---|---|
| Rock Dust | Calcium, Iron, Magnesium | 3-5 lbs | $5-$10 |
| Greensand | Potassium, Iron | 3-5 lbs | $15-$20 |
| Gypsum | Calcium, Sulfur | 5 lbs | $4-$8 |
| Kelp Meal | Trace Minerals, Hormones | 1-2 lbs | $10-$15 |
| Homemade Compost | Mixed Nutrients | 1-2 inches deep | Free-$2 |
No matter what you pick, mix it into the top few inches with a shovel or rake so the roots get the benefit. Don’t forget: water well after you add stuff so minerals start dissolving and spreading around plant roots.
Checking Your Results
Once you've added those minerals, you want to make sure the soil is actually better. It’s not about hoping for the best—you need to see some proof before planting your next batch of carrots or sunflowers. Here’s how to know if your rematerialize garden soil effort really worked.
The quickest way: Do a follow-up soil test. You can pick up a kits for under twenty bucks, and they’ll show levels of phosphorus, potassium, calcium, magnesium, and pH. If you’ve just added rock dust or a mineral mix, test after a rain or a couple of good waterings. If the numbers budge in the right direction, you’re on track.
Don’t toss your receipts for that test kit yet. Keep the before-and-after results. Here’s a sample of typical changes you might see when you remineralize and then test a few weeks later:
| Mineral | Average Before (ppm) | Average After (ppm) |
|---|---|---|
| Phosphorus | 10 | 25 |
| Potassium | 80 | 160 |
| Calcium | 700 | 1400 |
| Magnesium | 30 | 60 |
If those numbers climb, your soil’s ready for a second chance. Still stuck in low gear? Could be you need another round of amendments, or less watering so nutrients don’t leach away fast.
But you don’t always need a science experiment. Pay attention to the plants: new growth should look richer, leaves more vibrant, and yields should go up. Milo and I once tracked tomato harvests before and after remineralizing: our harvest nearly doubled the next summer. Don’t forget—earthworms and healthy bugs are a sign you’re winning. If Rufus tries to dig up more worms after you remineralize, that’s good news.
- Check plant color and growth rate every couple weeks.
- Compare yield: more fruit or flowers is a sure sign of success.
- Watch for fewer yellow leaves and less stunted growth.
- Earthworm count is a weird but reliable trick. More worms = better soil.
It doesn’t have to be complicated. If the plants look better and your quick test shows improvement, you’re on the right path. Keep a garden notebook to track changes season to season. That way, if things start slipping again, you’ll know exactly what worked last time.