Terrace Waterproofing Calculator
Waterproofing Requirements Calculator
Calculate your terrace's slope needs, material costs, and maintenance schedule
Results
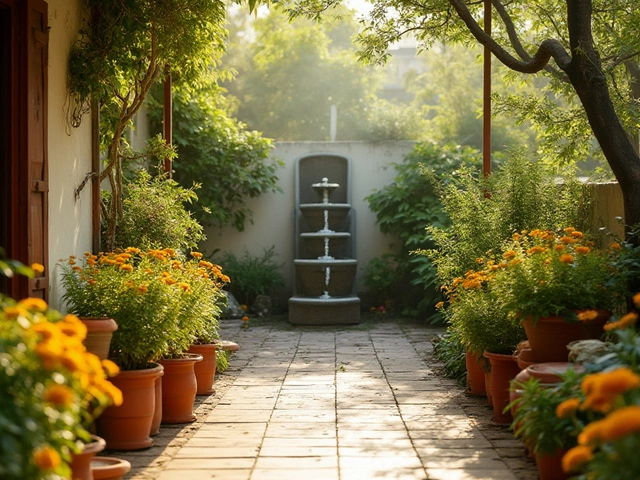
Waterproofing a terrace isn’t just about stopping leaks-it’s about protecting your home, your neighbors below, and your garden. If you’ve ever watched rainwater seep through cracks, seen mold grow on ceiling corners, or lost potted plants to soggy soil, you know how critical this step is. A properly waterproofed terrace lets you grow vegetables, herbs, or flowers without risking structural damage. And no, slapping on a coat of paint won’t cut it.
Why Most Terrace Waterproofing Attempts Fail
People often think waterproofing means applying a shiny sealant or redoing the tiles. But the real problem starts underneath. Most terraces are built with a concrete slab that absorbs water like a sponge. Over time, cracks form from temperature shifts, root pressure, or poor drainage. Water doesn’t just sit on top-it creeps through tiny pores, then finds the weakest point: a joint, a pipe penetration, or a thin spot in the finish.
When you plant on a terrace, you add even more stress. Watering daily, heavy pots, and root systems all increase moisture load. A failed waterproofing job doesn’t just stain your ceiling-it can rot wooden beams, rust steel supports, and even cause structural failure in extreme cases. The goal isn’t to block water temporarily. It’s to create a barrier that lasts 10-15 years with minimal maintenance.
The Only Three Reliable Methods That Actually Work
There are three proven systems for terrace waterproofing, each suited to different situations. None of them involve paint, epoxy glue, or DIY spray cans sold at hardware stores.
- Liquid-applied membranes - These are flexible, rubber-like coatings applied with a roller or sprayer. Brands like SikaLatex, Tremco, and GCP apply as a liquid and cure into a seamless, elastic layer. They bridge small cracks (up to 2mm) and handle movement without peeling. Ideal for flat or slightly sloped terraces with existing tiles.
- Polyethylene sheet membranes - Thick, reinforced plastic sheets (1.5mm or thicker) laid over the concrete. They’re glued down at seams and anchored at edges. Best for new constructions or major renovations where you can remove old flooring. They’re cheaper than liquid systems but require perfect installation-no wrinkles, no punctures.
- Bituminous membranes with fiberglass reinforcement - These are pre-made rolls of asphalt-based material with a glass-fiber core. They’re heat-welded or torch-applied. Common in commercial buildings but also used in homes. They’re durable in extreme heat and UV exposure, but require professional installation due to fire risk.
For most home gardeners, a liquid-applied membrane is the sweet spot. It’s DIY-friendly, works over existing tiles, and doesn’t raise the floor height-critical if you have a door or step leading to the terrace.
Step-by-Step: How to Waterproof Your Terrace (DIY Version)
Here’s how to do it right if you’re tackling it yourself. Skip any step, and you’ll regret it later.
- Clear everything. Remove all pots, planters, furniture, and debris. Sweep the surface clean. No dirt, moss, or old sealant left behind.
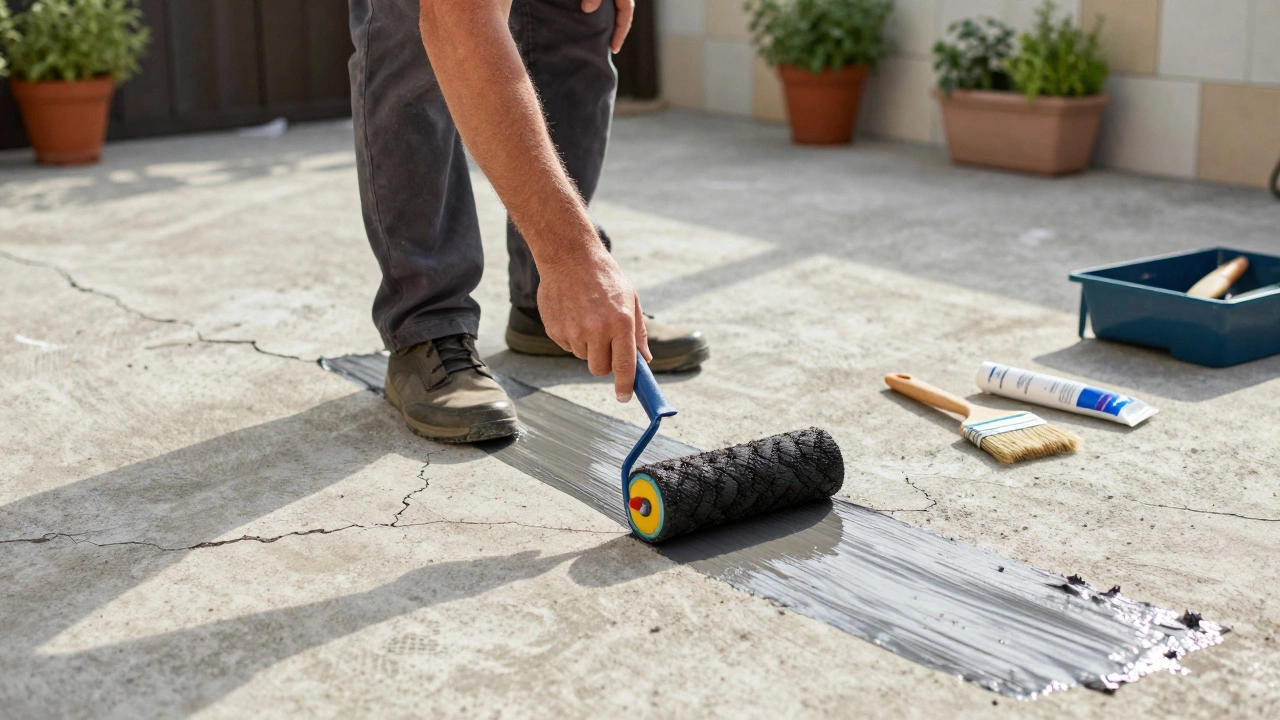
- Fix cracks and holes. Use a flexible polyurethane filler like SikaFlex or Loctite PL Premium. Don’t use cement-it’s rigid and will crack again. Let it cure for 24 hours.
- Prime the surface. Apply a bonding primer designed for concrete. This helps the membrane stick. Most liquid membranes come with their own primer. Don’t skip this.
- Apply the membrane. Use a roller or brush to apply two coats, perpendicular to each other. Wait 4-6 hours between coats. Pay extra attention to corners, drains, and pipe openings. Build up thickness there-think of it like sealing a bathtub.
- Test for leaks. After 48 hours, flood a small section with 2 inches of water. Wait 24 hours. Check below for drips. If you see any, reapply in that spot.
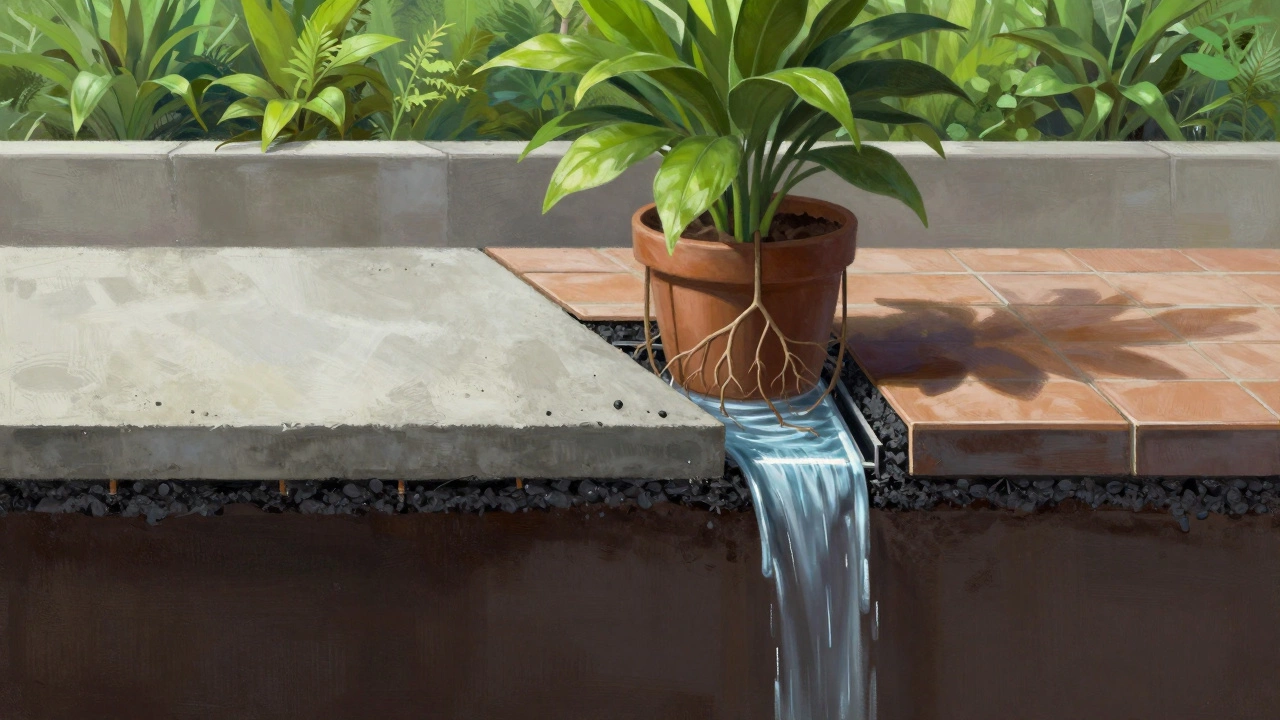
- Add a protective layer. Cover the membrane with a 1-2 inch layer of gravel or a drainage mat. This shields it from UV rays and foot traffic. Then lay your terrace tiles, pavers, or planters on top.
Pro tip: Use a drainage mat like Delta-MS or XPS foam boards under your planters. They lift pots off the surface, letting water flow freely to drains instead of pooling.

What Not to Do
There are common mistakes that turn good intentions into expensive disasters.
- Don’t use regular paint or sealers. Acrylic, latex, or garage floor coatings aren’t flexible. They crack in a year and trap moisture underneath-making leaks worse.
- Don’t ignore drainage. A waterproof membrane won’t help if water pools. Your terrace must slope at least 1-2% toward drains. Use a level and a long straight edge to check. If water sits for more than 2 hours after rain, you need to regrade.
- Don’t install over wet concrete. Concrete needs to cure for at least 28 days before waterproofing. If it’s still damp, the membrane will bubble and peel.
- Don’t skip the protective layer. UV light breaks down membranes over time. Even if the product claims to be UV-resistant, adding gravel or tiles adds decades of life.
Best Materials for Terrace Gardens
Once waterproofed, your choice of surface matters for plant health.
- Porcelain tiles - Dense, non-porous, and slip-resistant. Handle freeze-thaw cycles well. Best for cold climates.
- Concrete pavers - Easy to replace if damaged. Allow airflow under pots. Use a sand base for even settling.
- Composite decking - Only if it’s rated for direct exposure and has drainage gaps underneath. Not ideal for heavy planters.
- Gravel or pebbles - The cheapest option. Use 1/2-inch stone over a geotextile fabric. Lets water drain fast and looks clean.
For planting, always use containers with drainage holes. Never plant directly into soil on the terrace-without a root barrier, roots will eventually crack the membrane.
How Often Should You Re-Waterproof?
High-quality membranes last 10-15 years. But your climate and usage change that.
- In hot, dry climates (like Arizona or Rajasthan), UV exposure can degrade coatings faster. Inspect every 5 years.
- In rainy, humid zones (like Kerala or Seattle), mold and algae buildup can hide early damage. Clean the surface annually.
- If you notice peeling, soft spots, or discoloration, test for leaks immediately. Don’t wait for water stains.
Most homeowners wait until they see water inside. By then, damage is done. Check your terrace once a year-after the monsoon or snowmelt-just like you check your roof.
When to Call a Pro
You can DIY a small, simple terrace. But call a professional if:
- Your terrace is larger than 200 sq ft
- You have complex plumbing or electrical penetrations
- The slab is cracked or uneven
- You’re on the top floor of a multi-story building
- You’ve had leaks before and need a warranty
Professionals use infrared cameras to find hidden moisture and apply multi-layer systems with reinforced fabrics. A good contractor will give you a 10-year warranty. That’s worth the cost if your home’s structure is at stake.
Final Thought: It’s Not a One-Time Job
Waterproofing a terrace isn’t a weekend project you check off a list. It’s part of maintaining your garden, your home, and your peace of mind. Treat it like a foundation. Skip it, and everything else you build on top-your herbs, your flowers, your outdoor lounge-could collapse.
Do it right once, and you’ll enjoy your terrace garden for over a decade. Do it half-heartedly, and you’ll be patching leaks every year while your neighbors wonder why your ceiling looks like a watercolor painting.
Can I waterproof my terrace without removing the tiles?
Yes, but only if the tiles are in good condition and firmly attached. Liquid-applied membranes can be applied directly over clean, sound tiles after sealing cracks and priming. If tiles are loose, cracked, or lifting, they must be removed first-water will get under them and cause failure.
What’s the cheapest way to waterproof a terrace?
The cheapest option is using a polyethylene sheet membrane, but it requires removing existing flooring and is only practical during renovations. For existing terraces, a liquid membrane like SikaLatex costs around $1.50-$2.50 per sq ft for materials. That’s less than replacing damaged drywall or ceilings from leaks.
Do I need drainage on my terrace if I waterproof it?
Absolutely. Waterproofing stops water from leaking through, but it doesn’t remove water. Without drainage, water pools and creates pressure that can push under seams or around pipes. Always slope your terrace toward a drain or scupper. Even a 1% slope makes a huge difference.
Can I plant directly in the soil on my waterproofed terrace?
No. Soil holds moisture and encourages root growth, which will eventually pierce the membrane. Always use containers with drainage holes. Place them on bricks or drainage mats to keep them off the surface. This lets water flow freely and protects your waterproofing.
How do I know if my terrace is already waterproofed?
Look for a rubbery, slightly glossy surface under the tiles or in cracks. If you see a thick, flexible coating (not paint), it’s likely waterproofed. You can also do a simple test: pour water in one spot and wait 24 hours. If it doesn’t leak below, the system is working. If it does, you need to re-waterproof.