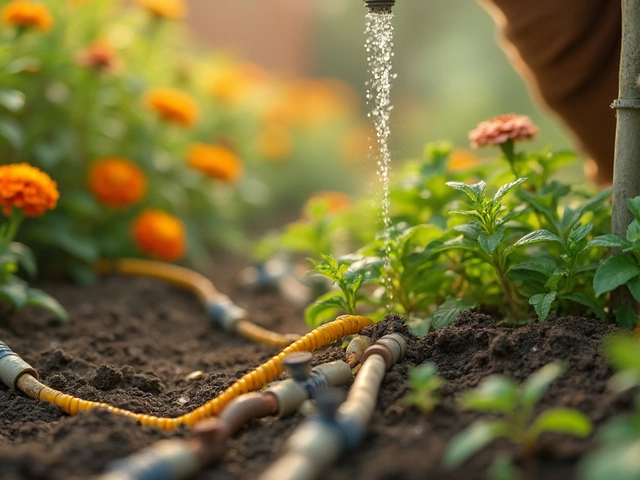
Clogged drip emitters can turn a smooth watering routine into a real headache. Most people don’t realize just how tiny the openings in these emitters are—they're about as thin as a sewing needle. That means anything floating in your water, from little bits of sand to clumps of algae, can jam things up fast and mess with your plants’ water supply.
If you’re using untreated well water, pond water, or even blown-in debris from the wind, you’re basically inviting problems. Filtration matters—always. One simple fix is adding a good quality filter right where your mainline hooks up to your water source. Think of it as cheap insurance against hours of clogged-emitter frustration down the road.
But here’s something most people miss: regularly flushing your lines. It’s like cleaning leaves out of gutters before they turn into a mucky mess. Just unscrew the end cap on your irrigation lines and let them run for a couple of minutes. This small move keeps junk from piling up, which means fewer clogs.
- How Clogging Starts in Drip Emitters
- Watch Out for These Signs of Blockage
- Tricks to Keep Emitters Clean
- Picking the Right Water Source
- Best Practices for Long-Term Maintenance
- What To Do When Emitters Are Already Clogged
How Clogging Starts in Drip Emitters
It surprises a lot of folks, but most trouble with drip irrigation starts small—literally. The inside of a typical drip emitter is barely a few millimeters wide. That means any grit, scale, algae, or even dissolved minerals out of your water supply can gum the whole thing up.
Clogging almost always comes from three main sources:
- Physical debris – bits of sand, silt, or rust from pipes.
- Biological stuff – algae, slime, or even tiny insects that wander into open lines.
- Chemical buildup – mainly calcium, iron, or other minerals that leave stubborn deposits over time.
If you’ve got water that looks clear but still has invisible dissolved minerals, those can build up layer after layer and slow your emitters down gradually without you even noticing at first. If you’re pulling water from a river, pond, or even old pipes, expect some kind of gunk to sneak through eventually.
Real-world tests by the University of California’s irrigation experts showed that unfiltered well or surface water could clog up new emitters in as little as two weeks. Even tap water, depending on the area, might have enough mineral content to start problems in a few months without regular cleaning.
| Source of Problem | Common Culprit | How Fast Can It Clog? |
|---|---|---|
| Physical Debris | Sand, silt, pipe rust | Days to weeks |
| Biological Growth | Algae, bacteria, insect larvae | A few weeks (faster in heat) |
| Chemical Buildup | Calcium, iron deposits | Weeks to months |
Once a drip emitter is gunked up, the water flow drops or stops completely. If you just hope it will clear up on its own, you’re likely to end up with dry plants and wasted money. Keeping an eye on what’s coming through your water, and understanding each type of possible clog, lays the groundwork for keeping everything running smooth. The sooner you tackle clogged drip emitters, the less hassle you’ll face later.
Watch Out for These Signs of Blockage
Clogged drip emitters don’t always scream for attention. Sometimes, the signs are subtle, but if you know what to look for, you can stop a small issue from turning into a full-on irrigation disaster. First thing you’ll notice? One or more plants start looking wilted while others are healthy and perky. If one area of your garden is drying up, that’s a red flag your emitter isn’t working right.
Keep an eye out for these hints that your emitter might be clogged:
- Little or no water is coming out of an emitter, while others nearby are flowing fine.
- You spot water puddling in weird places or notice soggy spots that don’t make sense based on your setup.
- Some plants near the emitter start wilting or have dry, crispy leaves when the rest look just fine.
- When you turn on the system, you hear air hissing or see bubbles right by the clogged emitter. It means air can get out, but water can’t flow like it should.
Getting hands-on is the fastest check. If you suspect a clog, pull the emitter and check if it’s gunked up with dirt or algae. Sometimes a quick rinse gets things moving again, but if not, you’ve caught the problem early before it affects too much of your garden.
Here's a quick table showing what to watch for, why it happens, and what it usually means:
| Sign | What Causes It | What It Means |
|---|---|---|
| Stunted or wilted plants | Clogged emitter, poor water delivery | Water not reaching plant roots |
| Minimal or no drip from emitter | Dirt, algae, debris inside emitter | Clog inside the emitter |
| Puddling or overflowing water nearby | Blockage causing pressure build-up | Water finding alternate escape route |
| Dry patches in watered zones | Clogged or poorly performing emitter | Certain emitters not working |
Checking your drip system once a week—especially before the hottest months—can save you a lot of stress. A slow or stuttering clogged drip emitters problem can sneak up on anyone, but spotting these signs early keeps things running smooth and your garden thriving.
Tricks to Keep Emitters Clean
The number one rule: don’t let junk get into your irrigation system in the first place. A clogged drip emitters problem starts way before you even see a trickle slow down—it’s what’s in your water and what you do (or don’t do) about it that matters most.
Use a high-quality filter. A 120-mesh or finer screen filter is usually enough for most situations. If your water has visible dirt or algae, go for a 150-mesh disk filter for even more protection. Some folks install two filters: a larger one at the main valve to catch big debris, then a finer one before the emitter lines catch smaller stuff.
- Flush your system every few weeks: Open end caps or valves at the end of each irrigation line and let water run until it’s clear. This easily washes out buildup.
- Install pressure regulators: Emitters don’t work right if the water pressure spikes above what they’re made for. Too much pressure can break apart internal parts and clog them faster.
- Try anti-clogging emitters: These are specifically designed with moving parts to shake off dirt and keep the pathways open. They cost a bit more, but they’re worth it if your water source is questionable.
- Apply chlorine shock once or twice a season: Running a diluted chlorine mix through your system can dissolve algae and bacteria buildup. Don’t overdo it—just follow the recommendations from your emitter brand.
- Keep the lines above ground if possible: Burying lines means dirt, roots, and bugs can get in when there’s a small tear.
Check out this quick cheat sheet—notice how clean water totally changes the game:
| Water Source Type | Recommended Filter Mesh | Flush Frequency |
|---|---|---|
| City tap water | 100–120 | Once per month |
| Well water | 120–150 | Every 2 weeks |
| Pond/reservoir | 150+ (add disc filter) | Weekly |
If you’re seeing trouble spots, don’t just yank out and replace problem emitters. It helps more to take one apart and see what the blockage is. Sometimes a quick soak in vinegar loosens mineral scale, while a tiny pin or toothpick can pop out debris for a fast fix. Don’t make emitter cleaning a once-a-year thing—short, frequent maintenance routines pay off big time.

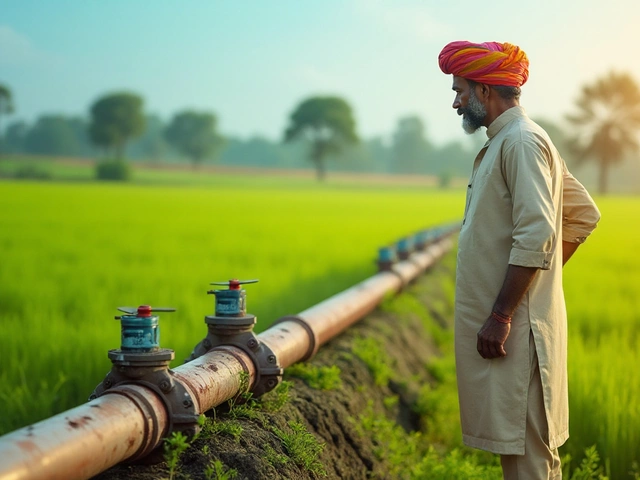
Picking the Right Water Source
Where your water comes from is one of the biggest factors in keeping your drip emitters from clogging. Not all water is created equal when it comes to irrigation. If you're pulling water straight from a well, pond, or canal, you’re likely to deal with more gunk—think grit, minerals, algae, and even tiny bugs. Municipal water, on the other hand, is usually treated and filtered, so it has way less junk floating around. That means fewer headaches for your clogged drip emitters.
Here's a helpful breakdown of what to watch out for with common water sources:
- Well water: Can contain lots of sand, silt, or iron that settles in your emitters. If your filter’s not up to the job, expect clogs.
- Pond, river, or ditch water: Usually loaded with algae, tiny plant pieces, and sometimes even micro-critters. These are prime clog-makers unless you use a really fine filter.
- Rainwater: Cleanest out of the bunch—but watch that your collection tank doesn’t fill up with leaves, grit, or critters. Some folks add a basic screen on the tank inlet for backup.
- City water: Ranks best for drip because it’s already filtered and doesn’t have loads of debris. Still, a filter is smart for catching any accidental grit.
Before you hook up your system, test your water or just look at it in a clear glass. If it’s cloudy, has floaties, or leaves a ring when it dries, you’ll want to step up your filtration game. The less junk that reaches the lines, the less you’ll fight with emitter clogs. Simple as that.
Best Practices for Long-Term Maintenance
If you want your drip irrigation system to keep running smooth, a regular maintenance routine is a must. It doesn't matter how good your gear is—even the best setups get gunked up if you ignore them for a season or two. Most clogs show up because folks forget the basics, so let's break down the habits that really work.
- Flush your lines at least a couple of times every growing season, especially before and after long breaks in use. This knocks out grit, algae, and mineral buildup before they cause trouble.
- Check and clean your main filter monthly. Most small systems use low-cost disk or screen filters, and cleaning only takes a minute. If your water source is extra dirty—think well water or a pond—do it more often.
- Inspect emitters for uneven flow. Mark any that seem slow or dry, and replace or clean them before issues spread. A $1 emitter is much cheaper than losing a whole garden bed.
- Use pressure regulators so your system runs at a steady, recommended PSI. Too much pressure cracks fittings or blows out lines, while too little can cause partial blockages.
- Install automatic flush valves at the end of long lines if your setup is bigger. These gadgets clear out lines every time the system runs, stopping sludge before you see symptoms.
Here’s a quick look at how simple maintenance habits stack up in stopping clogs according to an actual field study done by the University of California Cooperative Extension:
| Maintenance Habit | Reduction in Emitter Clogging (%) |
|---|---|
| Monthly Line Flushing | 65% |
| Filter Cleaning Every 2 Weeks | 72% |
| Annual System Overhaul (Flushing + Emitter Checks) | 82% |
Don’t skimp on any of these steps. Think of it like oil changes for your car—skip it, and you’ll pay more down the road. Following these tips will keep your clogged drip emitters problem off your to-do list and your plants watered—all season long.
What To Do When Emitters Are Already Clogged
So, your clogged drip emitters are messing up your watering schedule—what next? Don’t worry, most blockages can be cleared with a few simple moves. First off, figure out if it’s just one or two emitters or if your whole system is acting up. If it’s just a couple, chances are the problem is local and easy to fix.
For individual clogged emitters, follow these quick steps:
- Turn off the water and gently remove the clogged emitter from the line.
- Soak the emitter in a cup of warm, soapy water for about 15-30 minutes to loosen dirt, algae, or mineral buildup.
- Use a toothbrush or a soft brush to scrub away debris. Sometimes just blowing through the emitter works, especially for minor clogs.
- If that doesn’t help, poke a thin wire or a paperclip through the outlet to clear out stubborn blockages. Rinse thoroughly with clean water before reattaching.
- Pop it back onto the tubing and turn the system back on. Check if the water is flowing evenly from that spot.
Some folks collect the most stubborn emitters and soak them in white vinegar overnight. The acid in the vinegar breaks down mineral buildup, which is a leading cause of clogs if you have hard water.
If lots of your emitters are clogged, your main line might be dirty. In this case:
- Flush your main and lateral lines by opening the end caps and letting water blast out for a couple minutes.
- Check your filter. Clean or swap it if it looks gunky. Most filters need rinsing every month, especially in dusty areas or if your water’s not the cleanest.
Here’s a quick at-a-glance table with typical causes of clogging and the best ways to clear each type:
| Clogging Cause | Action to Unclog |
|---|---|
| Sand or grit | Remove emitter, rinse, and flush the lines |
| Algae buildup | Soak emitter in warm soapy water, scrub well |
| Mineral/scale | Soak in vinegar, poke with wire if needed |
| Organic debris | Flush lines, rinse emitter, install better filtration |
If nothing works and an emitter is totally blocked, don’t stress. A pack of new emitters often costs less than your lunch—and keeping a few spares around saves you from last-minute rushes to the hardware store. Swapping out an old emitter for a fresh one takes just seconds. And it’s way easier than trying to save a dud that won’t unclog no matter what you do.