Terrace Slab Material Selector
Recommended Terrace Slab Material
Material Comparison Table
| Material | Thickness | Cost (£/m²) | Strength (MPa) | Best For |
|---|---|---|---|---|
| Concrete | 60-100 mm | £40-£60 | 25-35 MPa | High-traffic areas, modern designs |
| Natural Stone | 30-50 mm | £80-£120 | 20-30 MPa | Traditional gardens, decorative finishes |
| Clay Paver | 40-60 mm | £45-£70 | 15-25 MPa | Patterned layouts, historic styles |
| Porcelain Tile | 20-30 mm | £60-£90 | 30-40 MPa | Smooth finish, low-maintenance zones |
When planning a garden terrace, Terrace slab is a flat, load‑bearing platform that forms the base of an outdoor floor provides the sturdy surface you need for seating, pots and foot traffic. This guide breaks down exactly what a terrace slab is, the materials you can choose, how to install one correctly and how to keep it looking good for years.
Key Takeaways
- A terrace slab is a flat, structural element that supports garden flooring.
- Common materials include concrete, natural stone, clay pavers and porcelain tiles.
- Proper sub‑base preparation and drainage are critical to prevent cracking.
- Installation can be a DIY weekend project if you follow the step‑by‑step plan.
- Routine cleaning and sealing extend the slab’s life dramatically.
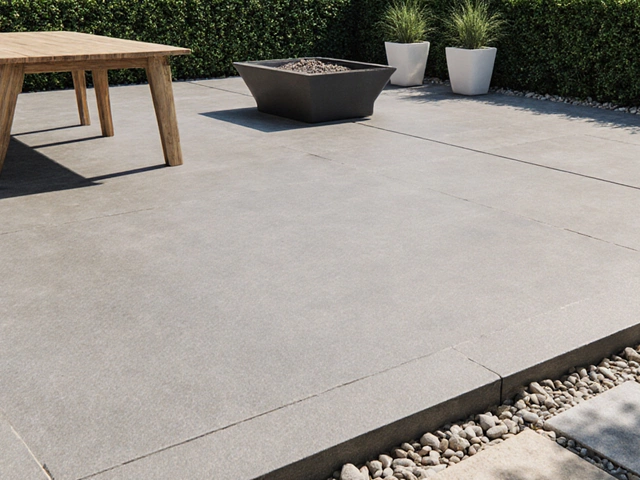
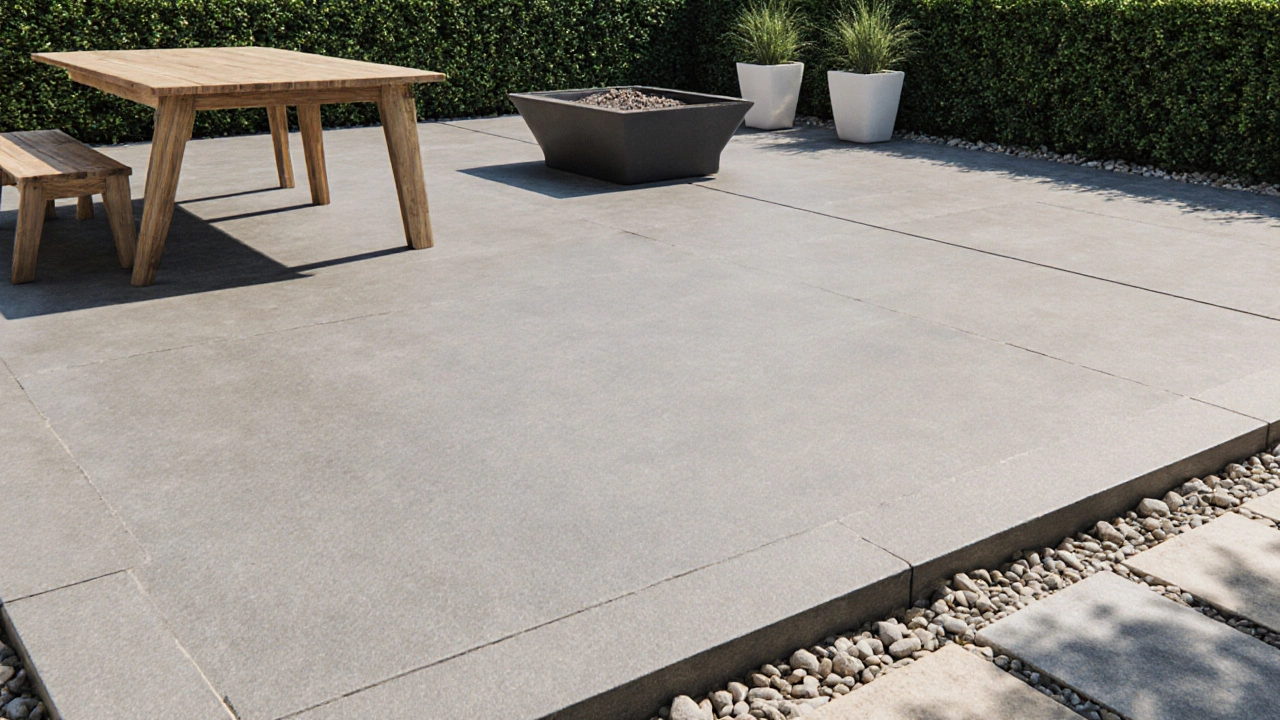
What Is a Terrace Slab?
Simply put, a terrace slab is a pre‑formed or poured component that creates a level, durable surface on an outdoor terrace. It differs from loose pavers because it acts as a single, continuous platform, spreading loads evenly across the underlying soil. Whether you buy a ready‑made concrete slab or cast one on site, the goal is the same: a stable, water‑resistant base for your garden activities.
Why Use a Terrace Slab?
Terrace slabs solve several practical problems:
- Load bearing: They handle the weight of furniture, planters and even small gatherings without sinking.
- Weed control: A solid surface blocks weed growth more effectively than individual pavers.
- Moisture management: When paired with proper drainage, slabs prevent water pooling that can damage nearby structures.
- Design flexibility: With a range of finishes, you can match any garden style, from modern concrete to rustic stone.
Common Materials and Types
Choosing the right material hinges on budget, aesthetic preference and the expected foot traffic. Below is a quick comparison of the most popular options.
| Material | Typical Thickness | Cost per m² (GBP) | Strength (MPa) | Best For |
|---|---|---|---|---|
| Concrete | 60‑100mm | £40‑£60 | 25‑35 | High‑traffic areas, modern designs |
| Natural Stone | 30‑50mm | £80‑£120 | 20‑30 | Traditional gardens, decorative finishes |
| Clay Paver | 40‑60mm | £45‑£70 | 15‑25 | Patterned layouts, historic styles |
| Porcelain Tile | 20‑30mm | £60‑£90 | 30‑40 | Smooth finish, low‑maintenance zones |
Design, Load & Drainage Considerations
Before you pour or place a slab, think about three key factors:
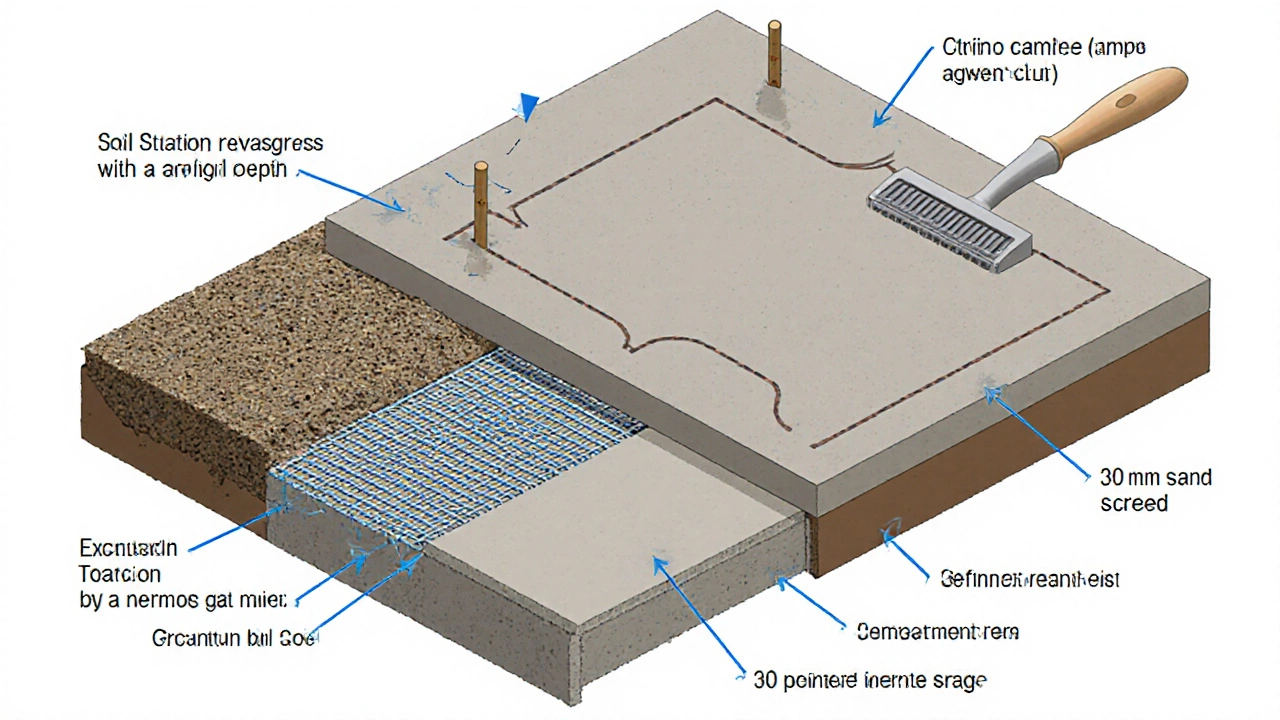
- Sub‑base preparation: A compacted layer of crushed stone (often called drainage aggregate) of at least 100mm provides a stable cushion and allows water to escape.
- Reinforcement: For slabs larger than 1m², embed a mesh of reinforcement mesh or steel rebar to resist cracking under load.
- Expansion joints: Install expansion joints every 3‑4m to accommodate thermal movement.
Calculate the expected load: a typical garden table with chairs adds about 500kg per square meter. Concrete slabs with a strength of 30MPa comfortably handle this, while fragile materials like porcelain need a thicker base.
Step‑by‑Step Installation Guide
- Mark the area: Use string and stakes to outline the terrace footprint. Check for level and square corners.
- Excavate: Remove soil to a depth of 150‑200mm, depending on slab thickness and sub‑base requirements.
- Lay the sub‑base: Spread crushed stone (drainage aggregate) and compact with a plate compactor. Aim for a uniform 100mm layer.
- Install a sand screed: Add 30mm of sharp sand, screed it smooth, and level with a straightedge.
- Place reinforcement: Position a grid of reinforcement mesh on the sand, ensuring 20‑mm clearance from the surface.
- Mix and pour concrete: For a 25mm slump, combine cement, sand, and aggregate at a 1:2:4 ratio. Pour evenly, covering the mesh fully.
- Vibrate and level: Use a concrete vibrator or tapping block to remove air bubbles. Float the surface with a steel trowel.
- Cut expansion joints: Once the slab sets (≈24hours), saw shallow grooves at the planned joint locations.
- Cure the slab: Keep the surface moist for 7‑10 days using wet burlap or a curing compound to achieve full strength.
- Apply sealant (optional): A breathable concrete sealant protects against stains and freeze‑thaw damage.
For pre‑cast stone or porcelain slabs, skip the mixing steps and simply lay the pieces on a sand‑bed, ensuring each is level and fits the expansion joint pattern.
Maintenance Tips for Longevity
- Regular cleaning: Sweep debris and wash with a mild detergent once a month to prevent algae buildup.
- Seal periodically: Re‑apply a breathable sealant every 2‑3 years, especially on concrete slabs.
- Inspect joints: Look for cracked or missing expansion joints after harsh winters and fill with flexible joint filler.
- Watch for settlement: If you notice unevenness, check the sub‑base for erosion and add more compacted aggregate as needed.
Typical Mistakes to Avoid
- Skipping the sub‑base - leads to cracks and uneven surfaces.
- Using the wrong slab thickness for heavy furniture - results in flexing and breakage.
- Neglecting expansion joints - causes random cracking due to temperature changes.
- Pouring concrete in hot, dry weather without proper curing - weakens the slab.
Alternatives to Traditional Slabs
If a full‑size slab feels overkill, consider interlocking pavers or a raised decking platform. These options still give a level surface but often require less excavation and can be rearranged later.
Frequently Asked Questions
Can I install a terrace slab on a sloping garden?
Yes, but you first need to create a level terrace pad by building a retaining wall or using compacted fill to bring the slope to a uniform height before laying the slab.
What thickness is safe for a concrete terrace slab?
A thickness of 60mm is the minimum for light foot traffic. For furniture and heavier loads, aim for 80‑100mm and include reinforcement mesh.
Do I need a waterproof membrane under the slab?
A separate waterproof membrane isn’t required if you have a well‑draining sub‑base and proper slope. However, in areas with high groundwater, a breathable membrane adds extra protection.
How long does a poured concrete slab last?
When installed correctly and maintained, a concrete terrace slab can last 25‑40 years, often outliving the surrounding garden structures.
Can I heat my terrace slab for winter use?
Yes. Installing electric floor‑heating cables beneath the slab before the concrete pour provides gentle warmth, but ensure the cables are rated for outdoor, wet‑area use.